 I'll be the first to admit it...I HATE IRONING! This is probably because I seem to have the uncanny knack to actually put more wrinkles in my clothes than I ever iron out. Thankfully, many years ago while working in a men's clothing store, I discovered a major retail clothing store secret: these stores don't keep their garments looking so good by ironing them, they STEAM the wrinkles out!
I remember the first time that I actually had to use a professional steamer myself. I was amazed at how the wrinkles seemed to just fall out of the clothing. I even used the steamer to iron a SUEDE jacket with absolutely no damage to the suede whatsoever.
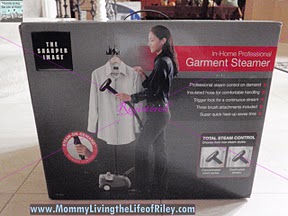
I always knew that this was the answer to my ironing woes and was extremely happy when The Sharper Image gave me the opportunity to review the In-Home Professional Garment Steamer. Would it be as good of a steamer as the ones I used back in my retail clothing store days? Read on to find out...
As soon as the In-Home Professional Garment Steamer arrived from The Sharper Image, I was ready to get it set up and start ironing! I think having a garment steamer is essential to any household because there are so many tasks you perform that an iron just doesn't work well for.
Take ironing tablecloths or curtains, for instance. Every year when the holidays roll around (parties, birthdays, Thanksgiving, Christmas, etc.) and I get out our good tablecloths used for covering up our two main tables, they always have a ton of wrinkles in them and must be pressed. Going over these tablecloths with a standard iron isn't a good option for two reasons. First, some of my tablecloths are made of silk and contain delicate handmade accents to them which should not be ironed on.
Second, it takes SO LONG to do and I always seem to miss a few spots, which then stick out like a sore thumb. With a garment steamer, I can actually put the tablecloth ON THE TABLE itself and steam away. I do have a table pad underneath the tablecloth which protects my furniture from the steam, but the great news is that I can iron out the wrinkles in my tablecloths in a matter of MINUTES and I never miss any spots this way either!
Next, I love using a garment steamer to iron the wrinkles out of freshly washed or newly purchased drapes and window treatments too. I can easily hang my window treatments on their rods and then steam away and remove any wrinkles in my curtains. I don't want to even think about how long it would take to iron a whole room's window treatments by hand. Knowing me, I bet I'd be ironing for DAYS and then probably still not be happy with the results!
|
|
|
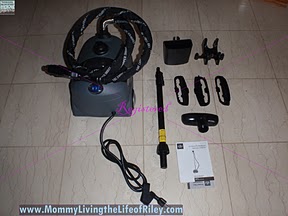
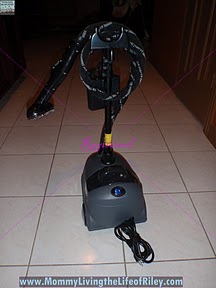
As you can see from the pictures above, my garment steamer arrived in perfect condition and contained very few parts. Assembly was a breeze and only required that the telescoping pole be inserted into the steamer unit, the attachment caddy be affixed to the telescoping pole and the steamer nozzle be attached to the end of the coiled hose handle. Then it was off to do some steaming! Look out wrinkles...here I come!
|
|
|
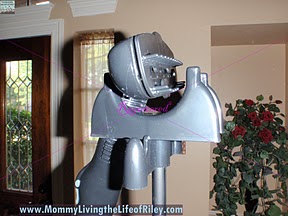
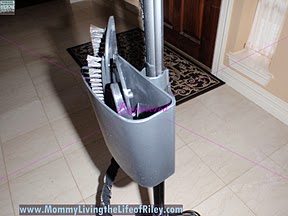
The upper left picture shows an up-close view of the steamer nozzle (using the fabric brush) cradled in the hanger holder. Look closely at the bottom of the hanger holder itself and you will notice two integrated garment hangers which are perfect for holding your clothes on their hangers while you steam them. In the upper right picture, you can see the three attachments and the caddy that come with the In-Home Professional Garment Steamer. You can choose between the lint/pet hair attachment, the upholstery brush and the fabric brush.
|
|
|
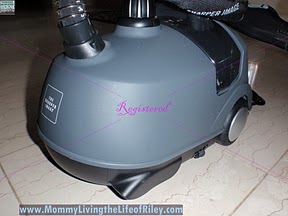
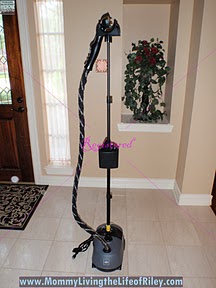
The upper left picture shows how sleek and sturdy the garment steaming unit is. There are large wheels on casters which allow this unit to roll anywhere you'd like. True to form, like all of the other products The Sharper Image sells, this garment steamer looked REALLY COOL! In a matter of minutes, my garment steamer was fully assembled and ready to go, as shown in the upper right picture.
|
|
|
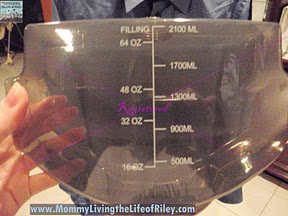
Next, it was time to fill up the water tank. All you have to do is unscrew the cap on top and fill it with water (preferably distilled, so that you can avoid mineral build-up in the garment steamer). When filled to capacity, this garment steamer will keep you steaming for HOURS, which is wonderful when you need to tackle a really large job!
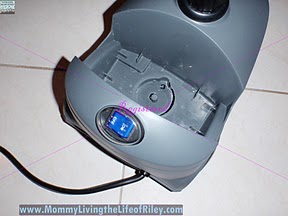
As you can see in the upper right picture, after using the steamer there will always be a little water left behind. This is when you should allow the unit to cool for at least 30 minutes, and then empty the reservoir by removing the drain plug and tipping the unit.
|
|
|
The ultimate test? I found a dirty wrinkled up dress shirt of my husband's at the bottom of our hamper to try the In-Home Professional Garment Steamer out on. After filling the tank with water and then plugging in the machine and turning it on, I found that I was ready to go in less than one minute. This garment steamer even has the "Steam on Demand" feature which allows me to push a button on the steam handle for a quick burst of steam.
If I'm looking for more, I can easily lock the button down so that steam comes out of the nozzle continuously. Because this shirt required MUCH more than a few shots of steam, I locked down the button and got to work. I steamed the right side of this shirt for only 30 SECONDS. The wrinkles literally fell out of the shirt and only in a few spots was a little water left behind. This water dried very quickly and left no trace behind of the shirt ever being wet in those areas.
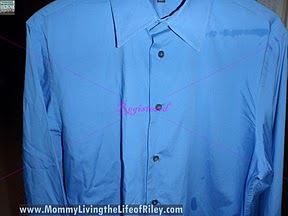
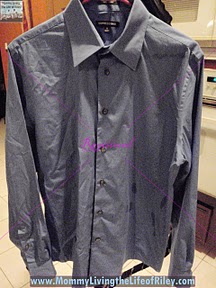
My pictures don't really do the results justice. The picture on the left was with my camera's flash on and the picture on the right was without a flash. I was very impressed at how well the wrinkles were removed from the right side of his shirt and was quickly reminded of my men's clothing store days. Also, the whole experience took less than a few minutes! I would still be getting my ironing board set up and heating up the iron in this amount of time.
|
|
Clean up and storing the unit were just as easy. I simply dumped the excess water out of the water tank and left it open to dry. Next, I emptied the excess water from the reservoir (the steamer unit itself) by removing the drain plug and tipping the unit. Finally, I opened the 3 clips on the telescoping pole and collapsed the pole. Then, I coiled the hose around the hanger attachment and wrapped up the electrical cord, securing it with the Velcro closure attached to the cord. That's it! Look how small it became...a definite plus because our closet space is very limited.
I highly recommend The Sharper Image In-Home Professional Garment Steamer. It produces steam very quickly, is extremely easy to set up, comes with multiple attachments to handle any job, and cleans and stores in a breeze. I was also impressed with the results I received on my husband's dirty shirt in under a few minutes. Of course, the unit looked sleek and sophisticated like all of the other The Sharper Image products do, too!
 |
|
Disclosure: I received the In-Home Professional Garment Steamer from The Sharper Image in order to facilitate my review. No other compensation was received. This product review is based on my own personal experiences with this item and is completely honest and objective. |
I'm a former 7th grade Science teacher turned stay-at-home mom that lives in Houston, Texas. I am married to my college sweetheart and have a beautiful daughter named Riley, who definitely keeps me on my toes! I am also involved in starting a small business which would both manufacture and sell an invention that I've patented, called Toothpaste 2 Go. I love interacting with my readers and hope to learn as much about you as you learn about me!
Melissa @ Mommy Living the Life of Riley!
Add Melissa Cleaver to your LinkedIn Network
Add Mommy Living the Life of Riley to your Google+ circle |


