 I have hated my skin for as long as I can remember. Every since I was about 15 years old, I have had one problem area which constantly breaks out on my cheek. This area never seems to heal completely and even though I am now 34 years old, I still suffer from acne here. Because of this, I've had to resort to caking foundation and powder on my face for all of my adult life, which stinks!
It never seems to look natural and if I begin to sweat or if I accidentally brush up against my cheek, my makeup rubs off and my skin looks horrible again. Professional makeup artists swear by the airbrush method of application for so many reasons and Luminess Air has actually made several systems available for home use.
So when I had the chance to review the iLuminess BC-100 Airbrush Cosmetics System, I couldn't say no. Could this be the solution I've been searching for all my life? CHECK OUT MY UNEDITED BEFORE AND AFTER PHOTOS AND SEE FOR YOURSELF!
The Luminess Air BC-100 Airbrush Cosmetics System delivers a very fine mist of foundation to your skin and the application itself is fairly easy...much like holding a pen and waving it slowly around your face. So why is the airbrush method of makeup application so much better than just using a makeup sponge and liquid foundation? Just look at some of the many benefits I've listed here:
- No more foundation mask...easy to blend in to your neck
- The look of blemishes, acne, red spots and large pores can be diminished or appear to vanish
- Exact color match of foundation is possible because different shades can be mixed together
- Lightweight...feels like you don't have any makeup on
- Great on face and body
- Minimizes the look of wrinkles and fine lines
- Get the exact amount of coverage you need...from light to maximum coverage
- Very hygienic - brushes never touch your face
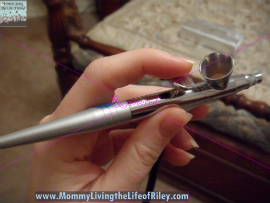
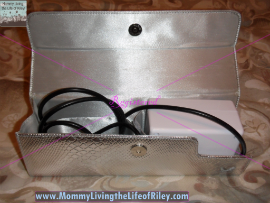
I was so ready to get started to see if the Luminess Air was going to be the answer to my skin's problems. I opened up the kit and was excited to find a DVD instructional video, a book which explained how to use the airbrush system step by step including nifty makeup tips, travel and storage kit, 4 shades of foundation as well as blush, shimmer and bronzer!
 |
 |
I watched the DVD closely and read through the book to make sure I understood how to use the Luminess Airbrush System. It was very straightforward and easy to use, but the application technique took a little practice. Basically, you start by choosing which shade or shades you think best match your skin tone.
I have very fair skin and used the second lightest shade they offer. I started off by dispensing 10 drops of foundation into the metal bowl located on top of the stylus. Next, push the power button on top of the airbrush unit itself in order to turn it on. Then, you want to hold the stylus like a pen and pull back the trigger with your index finger. This will emit a fine spray of foundation onto your face.
Now comes the tricky part. You want to move the stylus slowly around your face, but be careful not to hold the stylus closer than 3 or 4 inches from your face. If you hold it too close, you'll get a cakey look and the foundation will go on too heavy. If you're like me and want maximum coverage, then you must apply MANY thin layers, letting each layer completely dry before applying the next one. This took some practice on my part.
At first, I was inadvertently holding the stylus too close to my face and was also applying my layers too thickly without letting them dry completely. Once I slowed down and took my time, applying thin layers and letting each layer dry, I was very happy at the coverage I started to achieve. I've found a neat way of speeding up the drying process of each layer too. Because the airbrush stylus blows air constantly and only dispenses makeup when the trigger is pulled back, I use the stylus's airflow to help my foundation dry quickly. This really works well and only takes a few seconds for the foundation to dry between each layer.
Because the layers are so thin, you don't really notice the blemishes, wrinkles and acne disappearing, but then all of a sudden, they're gone! I really thought long and hard about showing my before picture, since I have always been very embarrassed of my skin, but I just had to show you the amazing results I received using the Luminess BC-100 system!
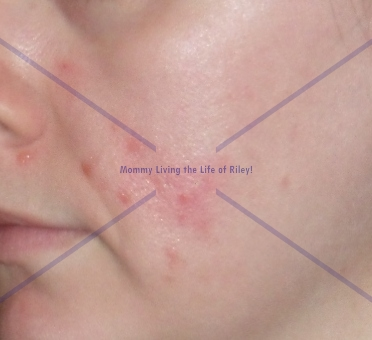
Before Picture Wearing Absolutely NO MAKEUP!
I used the 10 drops I originally put into the airbrush stylus mainly on the lower half of my face. As you can see, there is a dramatic difference in the way my skin looks!
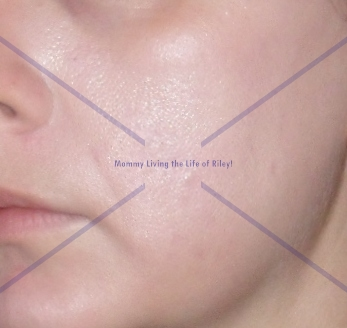
After Applying 10 Drops of Luminess Airbrush Foundation Using the BC-100 System
I wanted to see if I could completely cover up my acne, blemishes and red marks on this cheek and so dispensed another 10 drops into the airbrush stylus and applied several more thin layers.
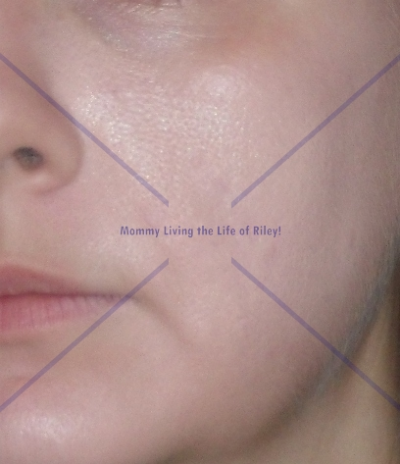
After Applying 20 Drops of Luminess Airbrush Foundation Using the BC-100 System
I was thrilled with the results. I even noticed the laugh lines around my mouth looked less defined and more smooth. The only downsides I noticed from the Luminess Airbrush Cosmetics System occurred around my eyes. I have several lines right underneath my eyes and it seemed that the foundation tended to settle in these lines and make them more noticeable. The fix was rather easy though for I took a makeup sponge and blended the makeup in lightly.
I also think I had to use a lot of foundation to achieve this coverage and can see how this might possibly be kind of expensive to use everyday. The good thing about being a stay at home mom though, is that I don't leave the house everyday, so I will definitely be using my Luminess to apply my foundation from now on!
After wearing the makeup for many days, I can also attest to the fact that the makeup STAYED PUT and didn't slide off my face after a few hours. It also felt very light even though I applied MANY layers. I was also pleased that it didn't settle into the lines around my mouth or eyes anything like my other foundations and powders would.
It did settle just a little, but by far better than anything else I've ever put on my face. If you are looking for a high-quality, high performance method of applying your makeup, then look no further than Luminess Air!
 |
|
Disclosure: I received the iLuminess BC-100 Beauty Series Airbrush Cosmetics System from Luminess in order to facilitate my review. No other compensation was received. This product review is based on my own personal experiences with this item and is completely honest and objective. |
I'm a former 7th grade Science teacher turned stay-at-home mom that lives in Houston, Texas. I am married to my college sweetheart and have a beautiful daughter named Riley, who definitely keeps me on my toes! I am also involved in starting a small business which would both manufacture and sell an invention that I've patented, called Toothpaste 2 Go. I love interacting with my readers and hope to learn as much about you as you learn about me!
Melissa @ Mommy Living the Life of Riley!
Add Melissa Cleaver to your LinkedIn Network
Add Mommy Living the Life of Riley to your Google+ circle |


